CI/CD with Wercker
Introduction
If you’re starting a new project one of the steps you need to perform is setup Continuous Integration (CI) and Continuous Deployment (CD) processes. It’s highly possible that you’re familiar with CI tools like Jenkins, Visual Studio Team Services or Octopus. I would like to introduce you to something new. This tool is named Wercker.
In my opinion, Wercker could be interesting for developers who are working with or are considering to start a new project based on Docker. It will automatize process of creating a Docker image containing your application, performing unit and integration tests and at the end publishing a newly created image to DockerHub. I think that the most significant advantage of Wercker is that it is free (at least at the moment of writing this article).
BTW, if you aren’t familiar with DockerHub, in short words it is a repository for Docker images. By the analogy to the GitHub, you can pull and push your images to a dedicated repository. You can read more about pulling an image manually to the DockerHub in this post created by MaGa.
In this article, I would like to show you how to create a CI/CD process for an application written in ASP.Net Core 2. We’ll create a simple Web API application based on provided scaffolding. The CI/CD process will cover following steps:
- Docker image creation
- application building
- unit testing
- integration testing
- pushing a newly created image to our DockerHub repository
Things you need to set up before we can start are:
- .Net Core 2 SDK installed on your machine
- a DockerHub account
- a GitHub account
With those zero steps fulfilled, we can start setting up our CI/CD process.
Github repository
First of all, we will set up a repository on GitHub for our project. If you don’t have any project around you can clone that created by me to your local machine:
git clone https://github.com/rafalpienkowski/wercker-ci-cd.git
I would like to describe my application a little bit in next section.
Application
I’ve created a new .Net Core web application based on the Web API template. To do that we just need to run the dotnet command. We will name our application “SimpleApi”.
dotnet new webapi --name SimpleApi
I’ve made some changes in code generated from scaffolding. I’ve added IValueRepository interface with a simple “in memory” implementation. I’ve added simple unit and integrations tests for further use in the build process.
Unit test checks if during the call to the ValuesController to the Get method we’re calling GetAll() method from IValueRepository, We’re performing assertion against returned by the controller value. The test is listed below:
using System.Threading.Tasks;
using SimpleApi.Persistence;
using Xunit;
using Moq;
using SimpleApi.Controllers;
using System.Collections.Generic;
using SimpleApi.Models;
using System.Linq;
using FluentAssertions;

namespace SimpleApi.Tests
{
    public class ValuesControllerTests
    {
        [Fact]
        public void TestValuesGetAll()
        {
            // arrange
            var getAllList = new List<ValueModel>{
                    new ValueModel{
                        Id = 0,
                        Value = "First"
                    },
                    new ValueModel{
                        Id = 1,
                        Value = "Second"
                    }
                };
            var valueRepositoryMock = new Mock<IValueRepository>();
            valueRepositoryMock.Setup(m => m.GetAll()).Returns(getAllList.AsQueryable());
            var sut = new ValuesController(valueRepositoryMock.Object);

            // act
            var result = sut.Get();

            // assert
            result.Should().BeEquivalentTo(getAllList);
            valueRepositoryMock.Verify(m => m.GetAll(), Times.Once);
        }
    }
}
Integration tests utilized Microsoft.AspNetCore.TestHost.TestServer class. More about integration test in ASP.Net Core you can read in this article.
I’ve implemented two tests. In first one we are posting a value, getting all available values and checking if returned value looks like expected. In the second differs only in that we are posting two objects to the controller. We’re using the HttpClient class to communicate with our test server. Mentioned tests are listed below:
using System;
using System.Collections.Generic;
using System.Net.Http;
using System.Text;
using System.Threading.Tasks;
using Microsoft.AspNetCore.Hosting;
using Microsoft.AspNetCore.TestHost;
using Newtonsoft.Json;
using SimpleApi.Models;
using Xunit;

namespace SimpleApi.IntegrationTests
{
    public class SimpleIntegrationTests
    {
        private readonly TestServer _testServer;
        private readonly HttpClient _testClient;

        public SimpleIntegrationTests()
        {
            _testServer = new TestServer(new WebHostBuilder().UseStartup<Startup>());
            _testClient = _testServer.CreateClient();
        }

        [Fact]
        public async Task TestValuesPostAndGetAll()
        {
            var valueModel = new ValueModel
            {
                Value = "Test value"
            };

            await PostValueModel(new ValueModel {
                Value = "Test value"
            });

            var valueModels = await GetAllValueModels();

            Assert.Equal(1, valueModels.Count);
            AssertValueModelInList(0,valueModels,valueModel);
        }

        [Fact]
        public async Task TestValuesPostTwiceAndGetAll()
        {
            var valueModel = new ValueModel
            {
                Value = "Test value"
            };
            var valueModel2 = new ValueModel
            {
                Value = "Test value 2"
            };

            await PostValueModel(valueModel);
            await PostValueModel(valueModel2);

            var valueModels = await GetAllValueModels();

            Assert.Equal(2, valueModels.Count);
            AssertValueModelInList(0,valueModels,valueModel);
            AssertValueModelInList(1,valueModels,valueModel2);
        }

        private async Task PostValueModel(ValueModel valueModel)
        {
            var stringContent = SerializeToString(valueModel);

            var postMessage = await _testClient.PostAsync("/api/values", stringContent);
            postMessage.EnsureSuccessStatusCode();
        }

        private StringContent SerializeToString(ValueModel valueModel)
        {
            return new StringContent(
                JsonConvert.SerializeObject(valueModel),
                UnicodeEncoding.UTF8,
                "application/json"
            );
        }

        private async Task<IList<ValueModel>> GetAllValueModels()
        {
            var getMessage = await _testClient.GetAsync("/api/values");
            getMessage.EnsureSuccessStatusCode();

            var raw = await getMessage.Content.ReadAsStringAsync();
            return JsonConvert.DeserializeObject<List<ValueModel>>(raw);
        }

        private void AssertValueModelInList(int position, IList<ValueModel> actual, ValueModel expected)
        {
            Assert.Equal(expected.Value, actual[position].Value);
            Assert.Equal(position, actual[position].Id);
        }
    }
}
DockerHub
Next step will be the creation of the public DockerHub repository. To do that we need to log into DockerHub. After that, we need to click on the Create Repository button.
We need to fill all required fields (namespace and name) choose visibility of our repository (private/public) and click Crete button.
After those steps our repository is ready.
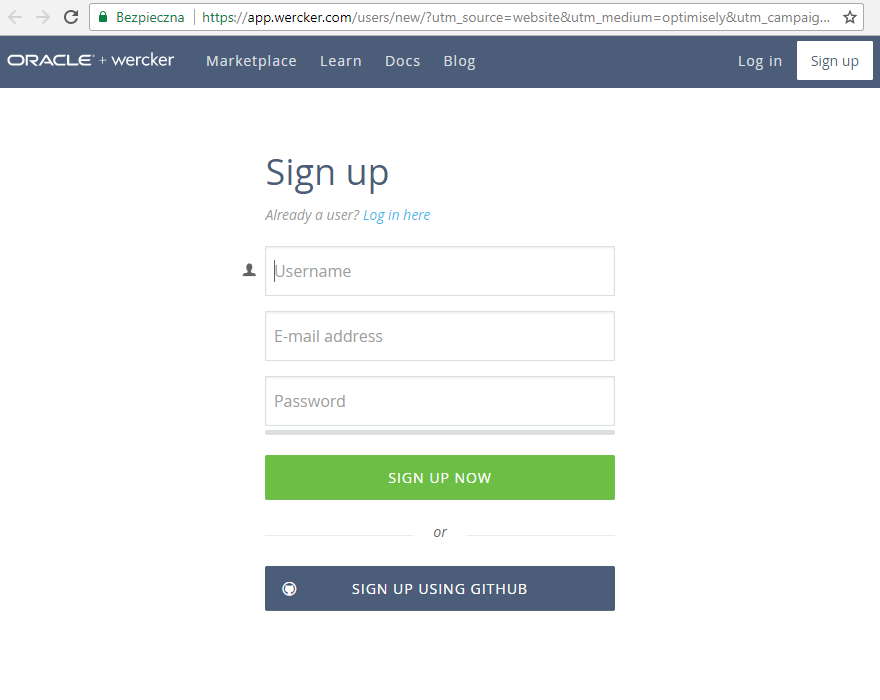
Wercker
We need to create a Wercker account. To do this, we need to go to the Wercker project website: http://www.wercker.com/. We can create a new account or sign up using GitHub account. And that’s all. We have a Wercker account. Simple isn’t it?
Let’s create a new application in Wercker. To do that we just need to click on “Create your first application” located on the welcome panel. After that, we need to go through the simple wizard form. We need to select owner of the application and SCM provider (currently there are three most popular available). In our case, we are choosing GitHub. After that, we need to select GitHub repository and define access type. In the last step, we will see a nice summary tab. The last thing to do is to click “Create” button. After that, we will see a site dedicated to our application in Wercker.
As we can see on the home page of our application, to trigger Wercker CI build we need to create a wercker.yml file and publish it into source code repository. After that build will be triggered automatically by any change made in the code.
The werker.yml dedicated for our application is listed below.
box: microsoft/dotnet:2.0.0-sdk
no-response-timeout: 10
build:
  steps:
    - script:
        name: restore
        cwd: src/SimpleApi
        code: |
          dotnet restore
    - script:
        name: build
        cwd: src/SimpleApi
        code: |
          dotnet build
    - script:
        name: publish
        cwd: src/SimpleApi
        code: |
          dotnet publish -c Release -o publish
    - script:
        name: chmod
        cwd: src/SimpleApi
        code: |
          chmod +x ./docker_entrypoint.sh
test:
  steps:
    - script:
        name: test-restore
        cwd: test/SimpleApi.Tests
        code: |
          dotnet restore
    - script:
        name: test-build
        cwd: test/SimpleApi.Tests
        code: |
          dotnet build
    - script:
        name: test-run
        cwd: test/SimpleApi.Tests
        code: |
          dotnet test
integration:
  steps:
    - script:
        name: integration-test-restore
        cwd: test/SimpleApi.IntegrationTests
        code: |
          dotnet restore
    - script:
        name: integration-test-build
        cwd: test/SimpleApi.IntegrationTests
        code: |
          dotnet build
    - script:
        name: integration-test-run
        cwd: test/SimpleApi.IntegrationTests
        code: |
          dotnet test
    - script:
        name: copy binary
        cwd: src/SimpleApi
        code: |
          cp -r . $WERCKER_OUTPUT_DIR/app
deploy:
  steps:
    - internal/docker-push:
        repository: rafalpienkowski/wercker-demo
        tag: latest, 1.0
        username: $USERNAME
        password: $PASSWORD
        registry: https://registry.hub.docker.com/v2
        entrypoint: "/pipeline/source/app/docker_entrypoint.sh"
        ports: "80"
env: "ASPNETCORE_URLS=http://+:80"
Let’s discuss most essential fragments of it:
- Box determines the base Docker image used for building our application. In our case, this is microsoft/dotnet:2.0.0-sdk image;
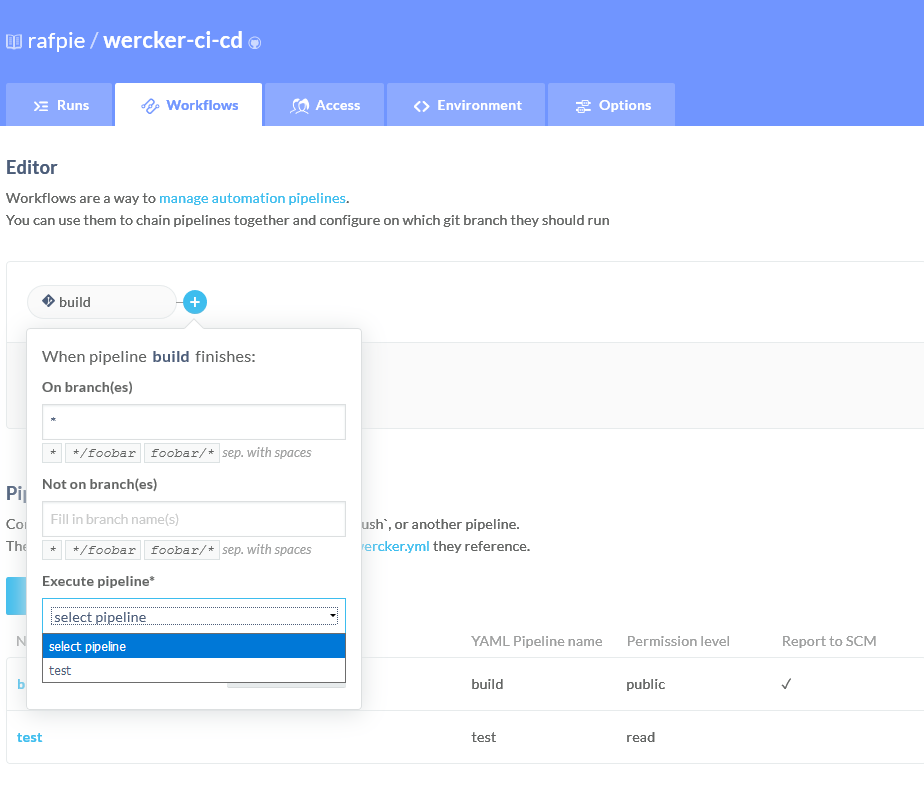
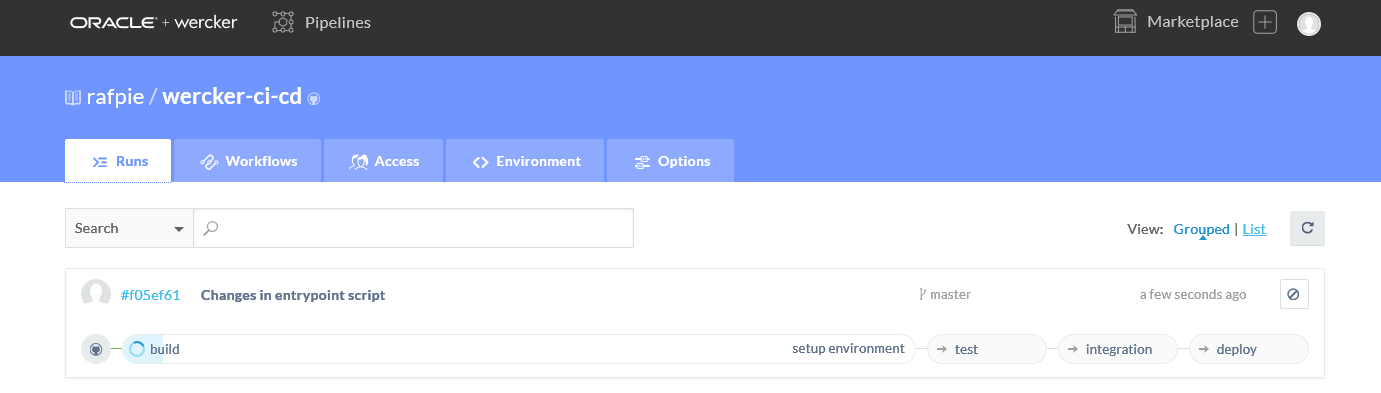
- Build, deploy and test is pipeline step. To utilize it we need to go to the Workflow tab in Wercker and define pipeline step name, its descriptive name in yml file and hook type. After creation of the step, we can configure our workflow. We can add step execution depend on branch names which allow us to create custom workflows for dedicated branches in our source code like the master, test, stage, etc.
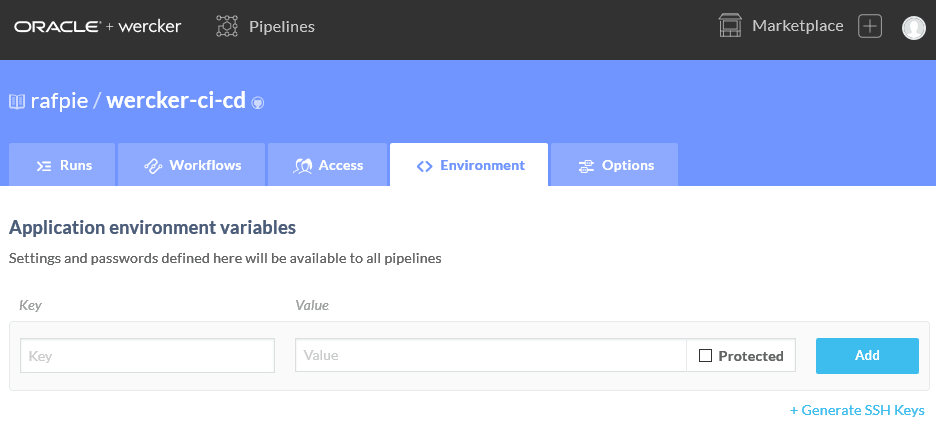
- Steps. Each pipeline consist of steps. More information about it toy can find here . In our case, most of the steps are simple scripts which contain a dedicated dotnet command (restore, build, publish, test). The internal/docker-push step pushes created Docker image to our DockerHub repository. We need to specify the repository, registry, username and password for our DockerHub repository. We can add an optional tag, entry point, environment variables. To avoid storage our DockerHub credentials in our public GitHub repository we can utilize built-in variables. I’ve used $USERNAME and $PASSWORD variable which you can declare on Environment tab.
After every change in our repository, Werker CI/CD process will be triggered. When a build fails, we will receive an email with dedicated information. We can watch the live progress of the process on Werker site. Build history is also available.
Conslusion
That all. We’ve created our CI/CD process which builds, tests and deploys our Docker image. As you could see it wasn’t hard.

I hope my short introduction into Werker CI/CD process will be useful for you. I want to encourage especially .Net developers to start using .Net Core in combination with Docker. In that case, having free CI/CD process which can be used for test purposes will be beneficial. Play with it on your own.
Cheers.